Spring showers provide a refreshing boost to the environment, replenishing water supplies and nurturing plant life. However, the same rainfall can expose and exacerbate vulnerabilities in your home’s roofing system. Even minor issues, like a loose shingle or a clogged gutter, can quickly escalate into major problems such as leaks, water damage, and structural decay.
Taking proactive steps to prepare your roof for the rainy season is crucial for safeguarding your home. A well-maintained roof not only prevents costly repairs but also enhances the overall durability of your property. By addressing potential weak spots in advance, you can protect your investment and enjoy the rainy season worry-free.
This guide breaks down practical, easy-to-follow tips for ensuring your roof is ready for spring showers. From cleaning gutters to inspecting flashing and shingles, these maintenance strategies will help you tackle the season with confidence. Whether you’re a seasoned homeowner or new to roof care, these actionable steps will keep your home safe and secure throughout the rainy months.
Why Spring Roof Preparation Matters
Spring rains can often be relentless, bringing heavy downpours that test the durability of your roof. Even seemingly minor roof issues, such as a cracked shingle or loose flashing, can lead to significant water damage if they are not addressed promptly. Preparing your roof for the season is essential to avoid potential disasters and ensure your home remains dry and secure.
Water Leaks
Small cracks, gaps, or damaged areas in your roof can become entry points for rainwater. Over time, even minimal leaks can seep into your attic or living spaces, causing damage to ceilings, walls, and insulation. Identifying and fixing these vulnerabilities early can save you from dealing with costly water damage later.
Structural Damage
Prolonged exposure to water can compromise the structural integrity of your roof. A weakened roof deck or rotting supports can jeopardize your roof’s ability to bear weight, increasing the risk of sagging or collapse. Regular inspections and maintenance prevent water from infiltrating and causing structural decay.
Mold Growth
Moisture buildup from leaks or improper drainage creates the ideal environment for mold and mildew to thrive. Not only does mold damage your home, but it also poses significant health risks to your family, including respiratory issues and allergies. Ensuring your roof is watertight can keep mold at bay.
Costly Repairs
Addressing minor issues proactively minimizes the risk of them escalating into expensive repairs or premature roof replacement. Preventative maintenance is always more cost-effective than dealing with extensive damage caused by neglect or delayed action.
By prioritizing roof maintenance before the rainy season begins, you can safeguard your home against the challenges of spring weather. Taking these steps also provides peace of mind, knowing your home is well-prepared to handle heavy rains without compromising its structure or comfort.
Inspect Your Roof for Winter Damage

Winter weather can leave your roof in a vulnerable state, making it essential to inspect key areas before the arrival of spring rains. Snow, ice, and freezing temperatures often cause wear and tear that can lead to leaks and other problems if not addressed. A thorough inspection is the first step to ensuring your roof is ready to handle the heavy rainfall that often accompanies spring.
Shingles
Shingles are your roof’s first line of defense against the elements, and winter can cause significant damage to them. Look for cracked, curling, or missing shingles that need immediate replacement. Damaged shingles not only compromise the roof’s ability to keep water out but can also lead to further deterioration of the underlying layers.
Flashing
The metal flashing around chimneys, vents, and skylights is another critical area to inspect. Flashing seals these vulnerable areas against water intrusion, but winter weather can cause rust, warping, or gaps. Any compromised flashing should be repaired or replaced to ensure a watertight seal.
Roof Valleys
Roof valleys, where two slopes meet, are particularly important because they handle a significant amount of water during rainfall. These low-lying areas are prone to debris accumulation, which can obstruct water flow and cause leaks. Check for any signs of wear or damage and clear out debris to keep water moving efficiently.
Soffits and Fascia
The soffits and fascia play a vital role in your roof’s drainage system. They support the gutters and help channel water away from your roof. Inspect these areas for signs of rot, warping, or other damage, as compromised soffits and fascia can lead to drainage issues and water pooling near your home’s foundation.
What to Do
Start with a visual inspection from the ground using binoculars to spot obvious signs of damage. If you’re comfortable, carefully climb a ladder to get a closer look at problem areas. However, for hard-to-reach spots or if you’re unsure about the condition of your roof, it’s best to hire a professional roofing contractor. A detailed inspection by an expert ensures no issues are missed and provides peace of mind that your roof is ready for the rainy season.
Clean and Maintain Gutters and Downspouts
Gutters and downspouts are essential components of your home’s drainage system, ensuring rainwater is effectively directed away from your roof and foundation. However, if they become clogged or damaged, the entire system can fail, leading to water pooling on your roof, overflowing gutters, and potential damage to your home’s foundation or landscaping. Proper gutter maintenance is a critical step in preparing your roof for the spring rainy season.
Clear Debris
Over the winter, gutters often accumulate leaves, twigs, and other debris, especially if nearby trees shed their foliage late in the season. Use a small scoop or gloved hands to remove all visible debris from your gutters. Pay special attention to areas near corners and downspout openings, where blockages are more likely to occur. Keeping your gutters clear allows water to flow freely during heavy rains.
Flush with Water
After clearing debris, use a garden hose to flush the gutters and downspouts. This serves two purposes: it ensures water is flowing freely and helps you identify any blockages in the system. Start at one end of the gutter and work your way toward the downspouts, watching for slow drainage or water backing up, which could indicate a clog.
Check for Damage
While cleaning and flushing, inspect your gutters for signs of wear and tear. Look for cracks, rust, or sections that have started to sag under the weight of debris or snow. Damaged or sagging gutters can lead to water spilling over the edges and pooling near your home’s foundation, potentially causing structural damage or basement flooding. Addressing minor issues like loose fasteners or small cracks promptly can save you from costly repairs later.
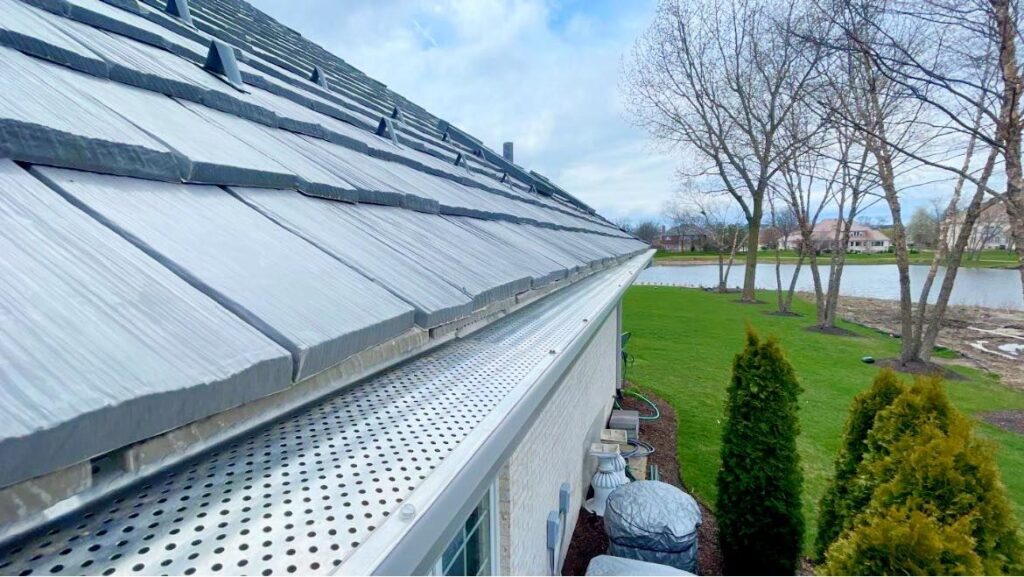
Install Gutter Guards
To minimize future maintenance, consider installing gutter guards. These covers or screens sit over your gutters and prevent leaves and debris from entering while still allowing water to flow through. Gutter guards are particularly helpful if you have trees near your home, as they significantly reduce the frequency of cleaning. While they require an upfront investment, they can save you time and effort in the long run.
Additional Tips
After completing your gutter maintenance, check the ground around your home’s foundation. Ensure that downspouts are directing water at least three to six feet away from the foundation to prevent pooling or erosion. Consider adding downspout extensions if necessary to improve water management and protect your home from excess moisture during spring showers.
By taking these steps to prepare your gutters, you can help ensure they perform effectively throughout the rainy season, protecting both your roof and your home’s foundation.
Check for Proper Drainage
Proper water drainage is critical in safeguarding your roof, foundation, and home from the challenges posed by heavy spring rains. While maintaining clean gutters is a significant step, ensuring the entire drainage system is functioning effectively is equally important. This includes assessing and optimizing the flow of water away from your home to prevent pooling and water damage.
Downspout Extensions
Downspouts are responsible for carrying water from your gutters down to the ground, but their placement plays a significant role in how effectively water is diverted away from your home. Without proper extensions, water may accumulate near your foundation, increasing the risk of cracks, erosion, or basement flooding. Ensure that downspouts extend at least 5–10 feet away from the house. If necessary, install flexible or rigid extensions to achieve the recommended distance, guiding water into a safe drainage area such as a swale or rain garden.
Grading Around the House
The terrain around your home should naturally slope away from the foundation to encourage water to flow outward rather than pooling against your structure. Over time, soil erosion or landscaping changes can alter the grading, creating low spots where water collects. Walk around your property during or after a rainfall to observe how water drains. If you notice pooling near the foundation, you may need to add soil to create a slight grade away from the house, aiming for a slope of at least 6 inches over the first 10 feet.
Install Splash Blocks or Drain Pads
Splash blocks or drain pads placed at the base of downspouts can help direct water further away from the foundation. These inexpensive additions prevent soil erosion directly beneath the downspouts and guide water into the intended drainage path. They are especially useful in areas with heavy rainfall or poor soil stability.
Inspect and Maintain Underground Drains
If your home has underground drainage systems connected to downspouts, inspect these for blockages or damage. Clogs can disrupt water flow, causing backups that spill over gutters or seep into the foundation. Flushing the system with a garden hose or hiring a professional for an annual cleaning ensures these systems remain clear and functional.
Additional Tips for Optimal Drainage
Consider adding gravel or mulch around your home’s perimeter to improve drainage and reduce soil erosion. If your yard has persistent water pooling or poor drainage, you might benefit from installing a French drain or a sump pump to manage excess water effectively. Addressing these issues early ensures your property remains protected from water-related damage during spring showers.
By focusing on proper drainage, you not only protect your roof and foundation but also reduce the likelihood of costly repairs and ensure your home stays safe and dry throughout the rainy season.
Inspect and Repair Flashing
Flashing is an essential element of your roof’s waterproofing system, acting as a barrier to prevent water from entering through joints and seams around chimneys, vents, skylights, and other roof penetrations. Despite its critical role, flashing can become compromised over time due to exposure to the elements, leaving your roof vulnerable to leaks and water damage. Regular inspection and maintenance of flashing are crucial for ensuring its effectiveness and preserving the integrity of your roof.
What to Look For
When inspecting your roof’s flashing, it’s important to pay attention to visible signs of wear and tear that could compromise its ability to keep water out.
Rust or Corrosion
Metal flashing, commonly made from aluminum, copper, or galvanized steel, is durable but not immune to the effects of moisture. Over time, prolonged exposure to rain, snow, and humidity can lead to rust or corrosion, especially in older flashing materials. Rust weakens the metal and creates holes or thin spots where water can seep through. Inspect all metal flashing for orange or brown discoloration, a clear indicator of rust, and consider replacing severely corroded sections.
Loose or Warped Sections
Flashing that has loosened or warped due to wind, temperature fluctuations, or improper installation can create gaps where water can penetrate. Check that all flashing is securely fastened to the roof and lies flat against the surface it is protecting. Warped sections may need to be removed and reinstalled correctly to ensure a snug fit.
Cracks or Gaps
Cracks in the flashing or gaps where sections meet are common problem areas that can lead to significant water infiltration. These openings often occur around corners, edges, or joints where flashing overlaps. Seal minor cracks or gaps with high-quality roofing caulk or a silicone-based sealant designed for outdoor use. For more extensive damage, replacing the flashing entirely is often the most effective solution.
How to Address Flashing Issues
Properly maintaining and repairing your roof’s flashing is key to preventing water from compromising your roof structure. Follow these tips to ensure your flashing stays in top condition:
- Clean the Area: Before applying any sealant or making repairs, clean the flashing surface to remove dirt, debris, and old caulk. A clean surface ensures better adhesion and a longer-lasting repair.
- Use Appropriate Materials: When sealing cracks or gaps, use products specifically designed for roofing applications. General-purpose caulks may not provide the durability or weather resistance required.
- Replace When Necessary: If flashing is heavily rusted, warped, or beyond simple repairs, replacement is the best course of action. Work with a professional roofing contractor to ensure proper installation, particularly in complex areas like roof valleys or around chimneys.
Preventive Measures
To extend the lifespan of your roof’s flashing, schedule regular inspections, especially after severe weather events that could dislodge or damage it. Additionally, ensure that gutters and downspouts are clear and functional to reduce water accumulation around vulnerable flashing areas.
By paying close attention to the condition of your roof’s flashing and addressing any issues promptly, you can protect your home from water infiltration and prolong the overall life of your roof.
Examine Shingles for Wear and Tear
Shingles serve as the first and most important barrier between your home and the elements. They shield your roof from rain, wind, UV rays, and fluctuating temperatures, ensuring the interior of your home remains dry and protected. However, over time, shingles can deteriorate or become damaged, compromising their ability to perform effectively. Regular inspection and prompt action are essential to keep your roof in peak condition, especially before the rainy spring season.
Signs of Damage to Look Out For
Recognizing the warning signs of damaged shingles can help you address problems early, preventing more severe issues down the line.
Curling or Buckling
Shingles that are curling or buckling indicate they have lost their ability to lie flat against the roof. This often happens due to prolonged exposure to heat, aging, or moisture infiltration. Curling shingles create gaps that allow water to seep underneath, leading to leaks and potential damage to the roof deck. If you notice widespread curling or buckling, it’s a clear sign your roof requires immediate attention.
Granule Loss
Granules are the tiny, sand-like particles on the surface of asphalt shingles, designed to protect against UV rays and weathering. Over time, granules can wear away, leaving shingles vulnerable to the elements. Check your gutters and downspouts for an accumulation of granules, which often signals that shingles are nearing the end of their lifespan. Bald spots on shingles themselves are another indicator of excessive granule loss.
Holes or Cracks
Even small holes or cracks in shingles can create significant problems during heavy rain. Water can penetrate through these openings, leading to leaks, rot, and potential damage to your attic and ceilings. Cracks may result from impact damage, such as hail or falling debris, or from the natural wear and tear of aging shingles.
What to Do About Damaged Shingles
Addressing shingle damage promptly can prevent costly repairs and protect your home from water intrusion.
Replace Damaged or Missing Shingles
If you spot curling, cracked, or missing shingles during an inspection, replace them as soon as possible. Delaying repairs can allow water to infiltrate your roof, causing widespread damage. For small-scale damage, individual shingles can be replaced, but extensive issues may require a more comprehensive roof repair or replacement.
Upgrade to Weather-Resistant Shingles
If your roof is older or has experienced repeated issues, consider upgrading to more durable shingles designed to withstand severe weather. Options like impact-resistant or architectural shingles offer enhanced performance and longevity. These upgrades not only improve your roof’s resilience but can also increase your home’s energy efficiency and curb appeal.
Preventive Maintenance Tips
To keep your shingles in good condition, incorporate regular maintenance practices:
- Conduct Routine Inspections: Inspect your roof at least twice a year, particularly before and after the rainy season. Use binoculars for a clear view or hire a professional if climbing onto the roof feels unsafe.
- Clear Debris: Remove branches, leaves, or other debris from your roof, as these can trap moisture and accelerate shingle deterioration.
- Keep Gutters Clean: Blocked gutters can lead to water pooling on the roof, putting added stress on shingles and increasing the risk of leaks.
By maintaining the condition of your shingles and addressing any damage promptly, you can ensure your roof is ready to handle the challenges of spring showers while extending its overall lifespan.
Address Moss and Algae Growth
Moss and algae growth on your roof can be more than just an aesthetic issue. These organisms trap moisture against the roof surface, which can lead to accelerated shingle wear, rot, and an increased risk of leaks. Over time, this trapped moisture can seep into your roof deck, compromising its structural integrity and leading to costly repairs. Additionally, moss and algae can make your roof appear aged and neglected, reducing your home’s curb appeal. Tackling this problem early is essential to preserving the health and longevity of your roof.
How to Safely Remove Moss and Algae
Removing moss and algae requires care to avoid damaging your roof. Harsh tools or chemicals can cause more harm than good, so it’s important to use safe methods.
Clean Safely
Start by using a soft-bristle brush or a roof cleaning tool designed for delicate surfaces. Avoid using pressure washers, as the force of the water can strip shingles of their protective granules or even dislodge them entirely. Create a cleaning solution by mixing water with a mild detergent, and gently scrub away moss and algae in a downward motion to prevent lifting shingles. Always work from the top of the roof downward to avoid pushing water under the shingles.
Apply Preventative Treatments
After cleaning, applying a commercial moss and algae inhibitor can help prevent regrowth. These treatments often come in liquid form and can be sprayed onto the roof. Choose products specifically designed for roofing materials to ensure compatibility and effectiveness. Zinc or copper strips installed near the roof’s ridge can also help inhibit moss and algae growth over time, as rainwater reacts with these metals to create a natural protective barrier.
Preventive Measures for Long-Term Protection
In addition to cleaning, taking proactive steps can help minimize the recurrence of moss and algae:
- Trim Overhanging Branches: Shade and dampness encourage moss and algae growth. Trimming trees near your roof allows sunlight to reach the surface, keeping it dry and less hospitable to these organisms.
- Ensure Proper Drainage: Blocked gutters can lead to standing water, which creates ideal conditions for moss and algae to thrive. Regularly clean your gutters and downspouts to promote efficient water drainage.
- Schedule Annual Roof Inspections: Professional inspections can help identify early signs of moss or algae growth and address them before they become significant problems.
By addressing moss and algae early and implementing preventative measures, you can maintain the integrity and appearance of your roof while extending its lifespan. Regular maintenance will also save you from costly repairs and keep your roof looking its best throughout the seasons.
Ensure Attic Ventilation

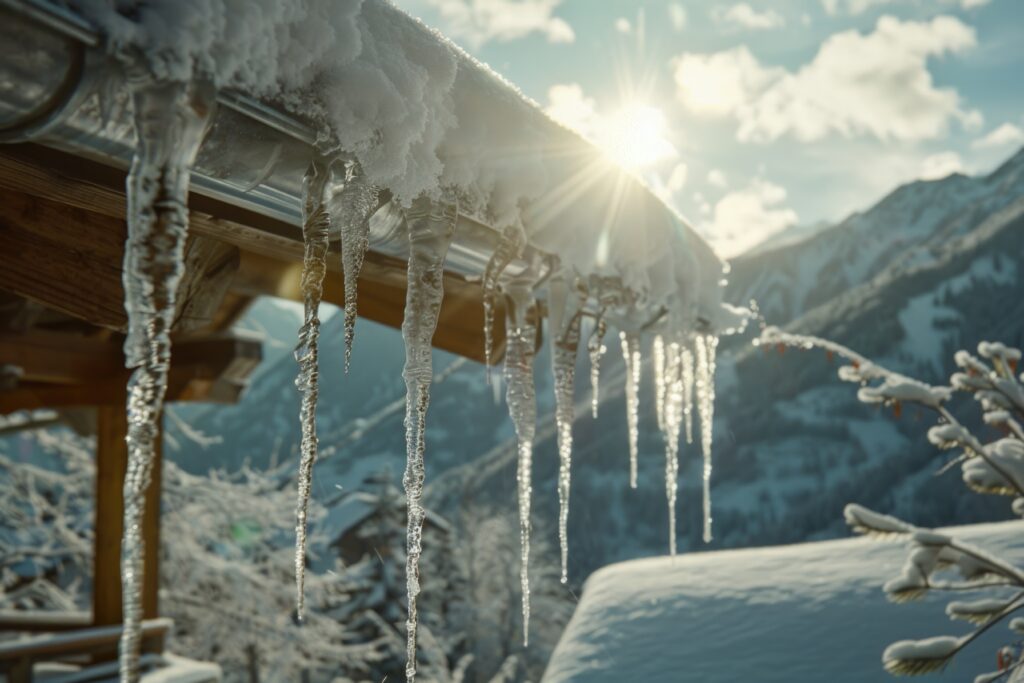
Proper attic ventilation is a crucial yet often overlooked factor in maintaining the health and longevity of your roof. Without adequate ventilation, trapped moisture can accumulate in your attic, leading to a host of problems such as mold growth, wood rot, and structural damage. During the winter months, poor ventilation can contribute to the formation of ice dams, which occur when heat from your attic causes snow on your roof to melt and refreeze at the edges. Addressing ventilation issues early can help protect your roof and home from long-term damage.
What to Check for Effective Attic Ventilation
Vents
Start by inspecting both intake and exhaust vents. Intake vents, typically located along the soffits, allow fresh air to enter the attic, while exhaust vents near the roof’s ridge let hot, moist air escape. Ensure these vents are clear of debris such as leaves, dust, or nests that could block airflow. Blocked vents disrupt the ventilation cycle and can lead to uneven temperature and humidity levels in the attic.
Air Circulation
Proper air circulation is key to maintaining consistent attic conditions. Verify that air moves freely throughout the space by checking for any obstructions, such as stored items, insulation blocking vents, or poor vent placement. A balanced system where air enters through the intake vents and exits through the exhaust vents is essential to maintaining an optimal environment in the attic.
Why Ventilation Matters
Good ventilation helps regulate attic temperature and humidity, preventing issues like:
- Mold Growth: Excess moisture creates an ideal environment for mold, which can spread quickly and affect indoor air quality.
- Wood Rot: Trapped moisture can weaken wooden structures, including the roof deck and supports, compromising the integrity of your roof.
- Ice Dams: During winter, inadequate ventilation can cause heat to build up in the attic, leading to uneven snowmelt and the formation of ice dams along the roof edges.
How to Improve Attic Ventilation
- Clean Vents Regularly: Periodically remove debris and ensure vents are unobstructed.
- Add More Vents: If your attic lacks adequate intake or exhaust vents, consider installing additional ones to improve airflow.
- Use Ventilation Accessories: Products like ridge vents, turbine vents, or powered attic fans can enhance ventilation efficiency, especially in larger or older homes.
- Check Insulation Placement: Ensure insulation isn’t blocking soffit vents, which can impede airflow and trap moisture.
By maintaining proper attic ventilation, you can protect your roof from damage, extend its lifespan, and create a healthier indoor environment for your home. Regular inspections and proactive maintenance can save you from costly repairs and energy inefficiencies in the long run.
Trim Overhanging Branches
Overhanging branches can pose significant risks to your roof, leading to both immediate and long-term damage. These risks are often overlooked, but taking proactive measures can save you from costly repairs and extend the life of your roofing system. Regularly assessing and managing tree growth around your home is a crucial part of roof maintenance.
The Risks of Overhanging Branches
Clogged Gutters
Branches that extend over your roof often shed leaves, twigs, and other debris, which can quickly accumulate in your gutters. Clogged gutters disrupt water flow, causing water to back up onto the roof or pool around your home’s foundation. Over time, this can lead to leaks, water damage, and even structural issues.
Shingle Damage
During high winds or storms, overhanging branches can scrape against your roof, causing physical damage to shingles. The constant friction can wear down protective granules on shingles, exposing the underlying layers to the elements and increasing the risk of leaks. Even minor scratches can shorten the lifespan of your roof over time.
Structural Damage
One of the most severe risks comes from branches breaking and falling during storms or heavy snow. A single large branch can cause significant structural damage, puncturing the roof or even collapsing sections. The financial and safety implications of this kind of damage are considerable, emphasizing the importance of preventative action.
How to Manage Overhanging Branches
Safe Distance
Trim back branches so they are at least 6–10 feet away from your roof. This distance minimizes the likelihood of debris falling onto the roof and prevents branches from scraping against shingles during windy weather.
Regular Inspections
Regularly inspect trees near your home for weak, dead, or overgrown branches. Pay special attention to trees that are tall enough to fall onto your roof in their entirety during severe weather.
Professional Pruning
For large or hard-to-reach branches, hire a professional tree service to safely trim them back. Professionals have the tools and expertise to handle complex pruning tasks without risking damage to your property or injury.
The Benefits of Proactive Branch Management
By keeping branches at a safe distance, you can protect your roof from unnecessary wear and tear. Properly maintained trees also enhance the overall aesthetics of your property while reducing potential hazards. In the long run, proactive branch management ensures the safety, efficiency, and longevity of your roof and gutters.
Apply Roof Sealant or Coating

For added protection against the challenges of spring showers, applying a roof sealant or coating is an excellent preventive measure. These specialized products create a waterproof barrier that shields your roof from moisture intrusion while providing other valuable benefits. By fortifying your roof’s defenses, you can extend its lifespan and reduce the risk of leaks or damage caused by heavy rainfall.
Benefits of Roof Sealants and Coatings
Extended Lifespan
Roof sealants help preserve the integrity of your roofing materials by minimizing wear and tear caused by water infiltration and fluctuating weather conditions. This added layer of protection reduces the need for frequent repairs and can significantly prolong the lifespan of your roof.
Enhanced Leak Protection
Sealants and coatings fill small cracks and gaps that may otherwise allow water to seep through. By creating a seamless, watertight surface, they prevent leaks from forming, even during prolonged periods of rain. This is especially beneficial for older roofs or roofs with minor imperfections.
UV Resistance
In addition to waterproofing, many roof coatings offer protection against harmful UV rays. Over time, sunlight can weaken roofing materials, causing shingles to crack, fade, or curl. A UV-resistant coating shields your roof from these damaging effects, ensuring it remains strong and functional for years.
Types of Roof Coatings
There are several types of roof coatings available, each suited to different roofing materials and needs. For example:
- Acrylic Coatings: Ideal for reflecting sunlight and improving energy efficiency.
- Silicone Coatings: Known for excellent waterproofing and durability in areas with heavy rainfall.
- Asphalt-Based Coatings: Commonly used on flat or low-sloped roofs for added weather resistance.
Application Tips
To maximize the benefits of a roof sealant, ensure the surface is clean and free of debris before application. Follow the manufacturer’s instructions carefully, and consider hiring a professional if you’re unsure about the process. Regularly reapply the coating as needed, depending on its durability and your local climate.
By investing in a quality roof sealant or coating, you can protect your roof against spring’s unpredictable weather, reduce maintenance needs, and increase your home’s overall resilience to the elements.
Schedule a Professional Inspection
If you’re unsure about your roof’s condition or lack the tools and expertise to perform a thorough inspection, hiring a professional is the best option.
Why Hire a Pro
- Expertise: Professionals can identify hidden issues that might be missed during a DIY inspection.
- Safety: Roofing inspections can be dangerous without proper equipment and training.
- Comprehensive Maintenance: Professionals can perform minor repairs and maintenance during the inspection.
Benefits of Spring Roof Preparation
Preparing your roof for spring showers offers numerous advantages:
- Prevent Water Damage: Addressing issues early helps protect your home from leaks and structural damage.
- Save Money: Proactive maintenance reduces the likelihood of costly repairs.
- Improve Energy Efficiency: A well-maintained roof contributes to better insulation and lower energy bills.
- Extend Roof Lifespan: Regular care ensures your roof remains durable and effective for years to come.
Conclusion
Spring showers don’t have to be a source of stress for homeowners. By following these seasonal roofing tips, you can protect your property from water damage, improve your roof’s performance, and extend its lifespan. Whether you tackle the tasks yourself or hire a professional, taking action before the rainy season begins will provide peace of mind and long-term savings.
Don’t wait—start preparing your roof for spring today and enjoy a worry-free season!